
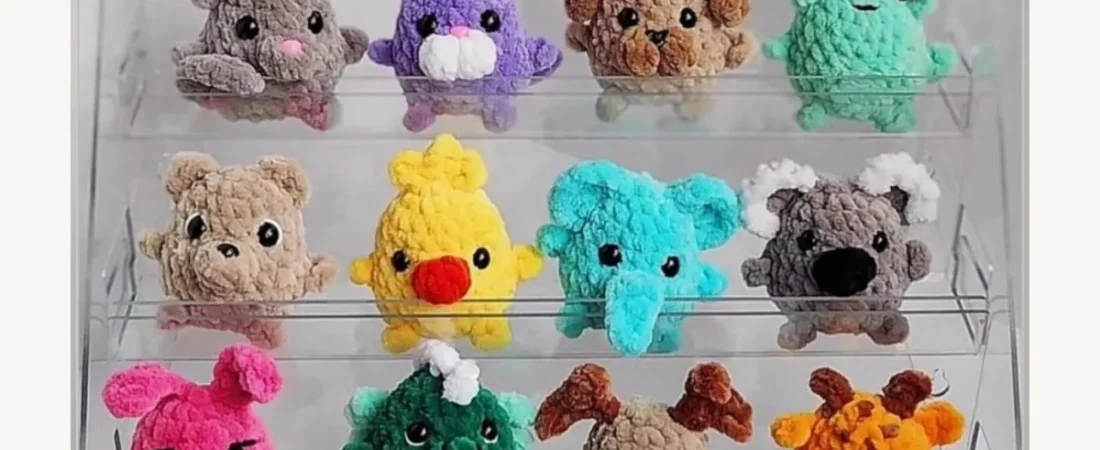
These free mini crochet animal patterns include 12 tiny amigurumi designs written in US crochet terms. Choose a bunny, bear, cat, mouse, dragon, chick, reindeer, frog, koala, puppy, giraffe, or elephant. The rounded construction is similar across the collection, but the faces, paws, tails, ears, and other details make each one distinctive.
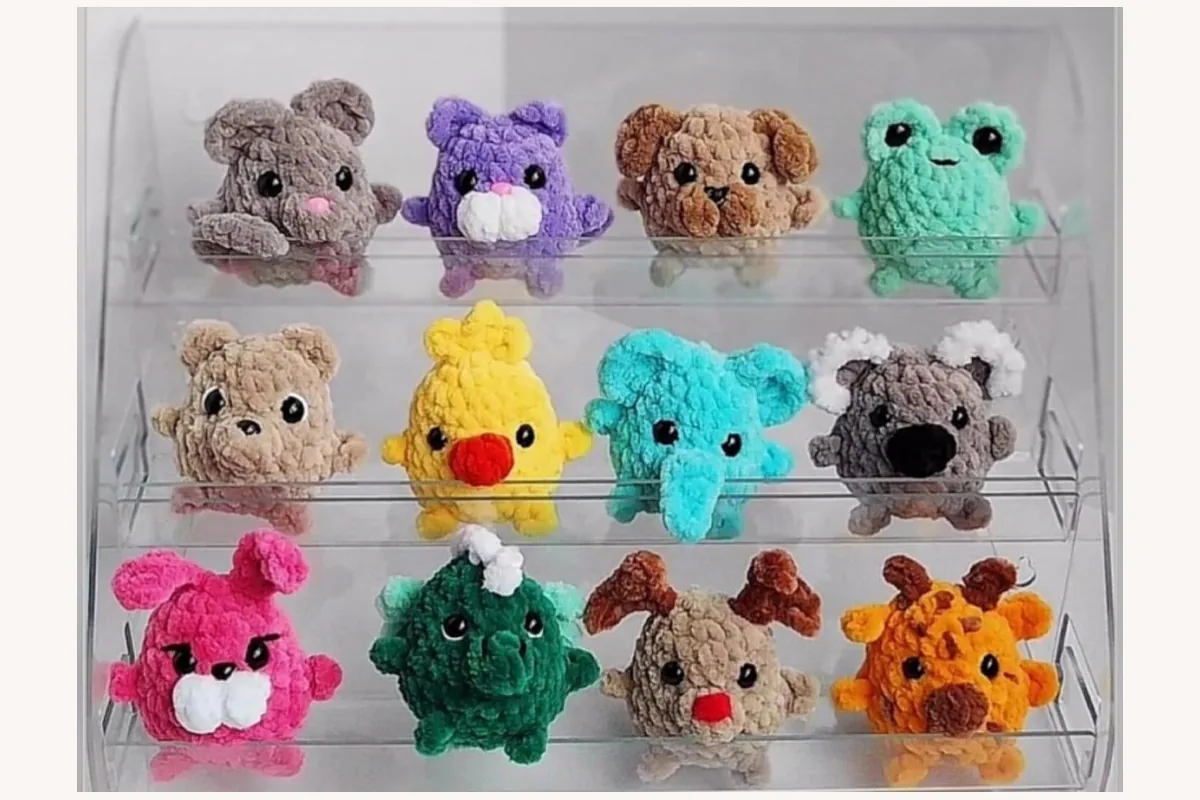
These little figures are a fun way to practice amigurumi shaping: you begin at the top of the head, enlarge the body, form the tiny paws as you crochet, and decrease to a closed base. Start by reading the shared technique notes and then follow one animal’s complete instructions from Round 1 to the final decoration. Use the stitch-count checkpoints to keep the small paws and raised details even as your work takes shape.
Pattern Overview
| Detail | What to know |
|---|---|
| Project | 12 small, stuffed crochet animal figures |
| Skill level | Basic-to-intermediate amigurumi; decorative bobbles and attached features need extra care |
| Crochet terms | US terminology throughout this article |
| Construction | Crocheted from the top of the head downward, with paws and some tails made as part of the body rounds |
| Yarn and hook | Not specified in the supplied source. Photos show plush-looking yarn, but no fiber, weight, brand, or hook size is confirmed. |
| Finished dimensions | Not supplied. Size will depend on yarn, hook, tension, and stuffing. |
| Gauge | Not supplied; use sufficiently tight fabric to retain stuffing. |
| Source | Russian-language illustrated pattern collection, 8-page supplied PDF containing 12 animal designs |
Jump to an Animal Pattern
Materials and Tools
- Yarn for the animal body, with extra contrasting colors for noses, muzzles, spots, and crests. The source photos show plush-textured yarn; exact brand, weight, and yardage are not stated.
- A crochet hook suitable for the chosen yarn and a firm, stuffing-safe stitch fabric. The source does not supply a numeric hook size.
- Polyester toy stuffing or another suitable washable stuffing.
- Yarn needle for closing the opening and weaving in ends; stitch marker for counting rounds; scissors.
- Plastic safety eyes in 8 mm, 9 mm, or 10 mm sizes for the individual animals that specify them; some versions also call for a separate nose. Safety eyes and glued details are not suitable for toys intended for children under three. Use securely embroidered features when making toys for young children.
- Optional matching embroidery yarn for facial details, giraffe spots, and the red reindeer nose.
US Crochet Abbreviations and Special Stitches
| Abbreviation | Meaning |
|---|---|
| MR | Magic ring |
| ch | Chain |
| sc | Single crochet |
| inc | Increase: 2 sc in the same stitch |
| dec | Single crochet decrease: sc2tog |
| sl st | Slip stitch |
| hdc | Half double crochet |
| dc | Double crochet |
| × 6 | Repeat the preceding group six times |
| 4-dc / 5-dc puff or bobble | Raised stitch made using four or five double crochets, as named in the source; the precise pull-through method is not specified |
Before You Begin: Three Pattern-Specific Rules
- Paws are chain loops, not extra body stitches. Wherever a round says paw, ch 4 and sl st into the base of the paw, then work the next body stitch in sequence. The paw is a decorative protrusion; do not count its chain stitches as body stitches.
- Round counts exclude the extended lengths of decorative tails and trunks. Crochet the side appendage where instructed, return to the base, and continue the body count. For the dragon, R8 and R9 additionally state a 34-stitch working total because the shaped tail is incorporated into later stitching.
- Check the bobble stitch you use. The Russian source describes raised stitches formed from groups of 4 or 5 double crochets but does not define their exact construction. Choose an established dc-bobble technique that fits the intended placement and compare the result with the supplied photograph. Treat this as supplementary technique guidance, not a verified replacement for a missing source step.
Stitch-count checkpoints: Most animals start 6 → 12 → 18 stitches in R1–R3, widen from 18 to 24 in R7, hold 24 through R9, then narrow to 12 and 6. The frog holds 18 stitches through R6. The dragon has a different tail-inclusive shaping sequence. The source describes top-down construction; it does not explicitly tell readers whether to join each round, so do not introduce joining slip stitches as if they were part of the written pattern.
Complete Free Mini Crochet Animal Patterns
Work one design at a time, keeping the round marker on the main body stitches. Each design below restates every round so you can work directly from its section without switching between patterns.
1. Mini Crochet Bunny Pattern
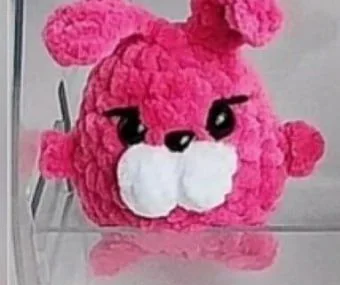
Appearance in the supplied photo: bright pink in the source photo. Eye information: Size not specified for bunny; use eyes appropriate to the yarn.
Body rounds (work from the head downward):
- R1: 6 sc in a magic ring. (6)
- R2: 6 inc. (12)
- R3: (1 sc, inc) × 6. (18)
- R4–R5: 18 sc in each round. (18 per round)
- R6: 7 sc, in white make two 4-dc puff/bobble stitches, then 9 sc. (18)
- R7: 2 sc, inc, 1 sc, paw, 1 sc, inc, (2 sc, inc) × 2, 1 sc, paw, 1 sc, inc, 2 sc, inc. (24)
- R8: 24 sc. (24)
- R9: 9 sc, paw, 5 sc, paw, 9 sc, one 4-dc puff/bobble for the tail. (24, as printed)
- R10: 12 dec. (12)
- R11: 6 dec. (6)
Long ears: Attach yarn at the head. Ch 6; starting in the second chain from the hook and working back along the chain, make 3 dc, 1 hdc, and 1 sc. Sl st into a nearby head stitch toward the crown. Fasten off. Repeat symmetrically for the second ear.
Finish: Stuff, attach the eyes and nose, close the remaining 6-stitch opening, and secure the ends. The original does not specify an eye size for this variant.
2. Mini Crochet Bear Pattern
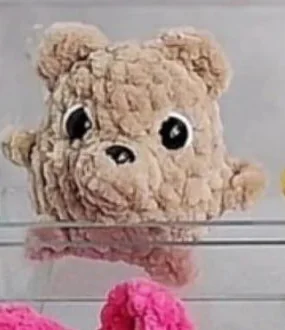
Appearance in the supplied photo: light beige in the source photo. Eye information: 9 mm safety eyes in the source; nose size is not specified.
Body rounds (work from the head downward):
- R1: 6 sc in a magic ring. (6)
- R2: 6 inc. (12)
- R3: (1 sc, inc) × 6. (18)
- R4–R5: 18 sc in each round. (18 per round)
- R6: 8 sc, one 5-dc puff/bobble, 9 sc. (18)
- R7: 2 sc, inc, 2 sc, paw, inc, (2 sc, inc) × 2, 2 sc, paw, inc, 2 sc, inc. (24)
- R8: 24 sc. (24)
- R9: 10 sc, paw, 5 sc, paw, 9 sc. (24)
- R10: One 4-dc puff/bobble for the tail, then 12 dec. (12, as printed). Shift the start of the round by 1 sc as indicated in the source. See the tail-count note below.
- R11: 6 dec. (6)
Rounded ears: Attach yarn near the top of the head. Work 3 hdc into one head stitch; sl st into the next stitch. Repeat on the opposite side for the second ear.
Finish: Cut yarn, stuff the figure, position 9 mm eyes and the nose, then close the final opening. Count note: the source combines a tail puff, 12 decreases and a one-stitch round shift; it does not specify whether the puff shares a base stitch. Preserve the stated count but verify its placement before continuing.
3. Mini Crochet Cat Pattern
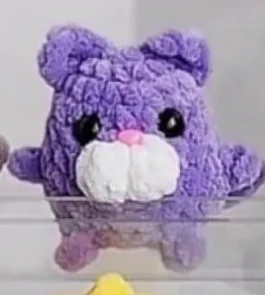
Appearance in the supplied photo: purple with white muzzle in the source photo. Eye information: 9 mm safety eyes; nose size not specified.
Body rounds (work from the head downward):
- R1: 6 sc in a magic ring. (6)
- R2: 6 inc. (12)
- R3: (1 sc, inc) × 6. (18)
- R4–R5: 18 sc in each round. (18 per round)
- R6: 7 sc, work two 4-dc puff/bobble stitches in white, then 9 sc. (18)
- R7: 2 sc, inc, 1 sc, paw, 1 sc, inc, (2 sc, inc) × 2, 1 sc, paw, 1 sc, inc, 2 sc, inc. (24)
- R8: 24 sc. (24)
- R9: 9 sc, paw, 5 sc, paw, 10 sc; ch 10 for the tail, work back along the chain, then sl st into the tail base. (24 body stitches)
- R10: 12 dec. (12)
- R11: 6 dec. (6)
Pointed ears: Attach yarn to the head. Into one stitch near the crown work 1 hdc, 1 dc, ch 2, and 1 hdc; sl st in the next stitch. Make the second ear symmetrically.
Finish: Fasten off, stuff, add 9 mm eyes and a nose, then close the opening and weave in ends. The chain-tail return stitches are not individually specified in the source.
4. Mini Crochet Mouse Pattern
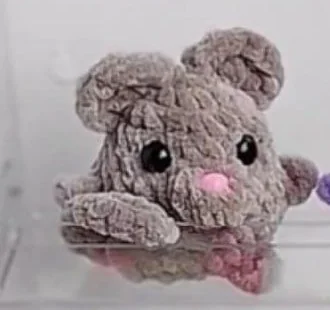
Appearance in the supplied photo: gray with pink nose in the source photo. Eye information: 9 mm safety eyes; a nose is also mentioned.
Body rounds (work from the head downward):
- R1: 6 sc in a magic ring. (6)
- R2: 6 inc. (12)
- R3: (1 sc, inc) × 6. (18)
- R4–R5: 18 sc in each round. (18 per round)
- R6: 8 sc, one 5-dc puff/bobble, 9 sc. (18)
- R7: 2 sc, inc, 2 sc, paw, inc, (2 sc, inc) × 2, 2 sc, paw, inc, 2 sc, inc. (24)
- R8: 24 sc. (24)
- R9: 10 sc, paw, 5 sc, paw, 9 sc. (24)
- R10: Work 1 sc to shift the beginning of the round; ch 15 for the tail, work 14 sc back along the chain, sl st into the tail base, then work 12 dec. (12, source count)
- R11: 6 dec. (6)
Round ears: Attach yarn near the crown. Work 6 dc into one head stitch, then sl st into the next stitch. Repeat symmetrically for the second ear.
Finish: Cut yarn and stuff. Add the 9 mm safety eyes and nose, then close the final opening. The beginning-of-round shift in R10 affects marker placement; do not accidentally work 13 decreases.
5. Mini Crochet Dragon / Dinosaur Pattern
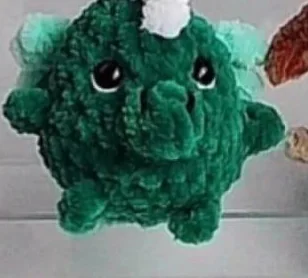
Appearance in the supplied photo: dark green with light crest in the source photo. Eye information: 8 mm safety eyes in the source.
Body rounds (work from the head downward):
- R1: 6 sc in a magic ring. (6)
- R2: 6 inc. (12)
- R3: (1 sc, inc) × 6. (18)
- R4–R5: 18 sc in each round. (18 per round)
- R6: 8 sc, one 5-dc puff/bobble, 9 sc. (18)
- R7: 2 sc, inc, 2 sc, paw, inc, (2 sc, inc) × 2, 2 sc, paw, inc, 2 sc, inc. (24)
- R8: 1 sc, ch 6 for the tail, work 5 sc back along the chain and sl st into its base, then 23 sc around the body. (24 body stitches + 10 stitches worked along the tail = 34 total, as explained by the source)
- R9: 1 sc on the body, 10 sc along the tail, 10 sc on the body, paw, 5 sc, paw, 8 sc. (34)
- R10: 17 dec. (17)
- R11: 9 dec. (8, as printed)—source count conflict: 9 decreases require 18 stitches, but R10 leaves 17.
- R12: 2 dec; no final count stated in the source.
Top crest: Attach yarn at the center of the top of the head. Work 1 sc into that same head stitch, ch 2, sl st into the next stitch, then 1 sc in the next stitch, ch 2 and sl st in the next stitch. Continue this repeated crest structure toward the tail, as shown in the source.
Finish: Fasten off, add stuffing carefully around the tail and raised back, insert 8 mm eyes and close the hole. This design needs an original-source clarification or test before publication as fully reliable instructions because of R11–R12.
6. Mini Crochet Chick Pattern
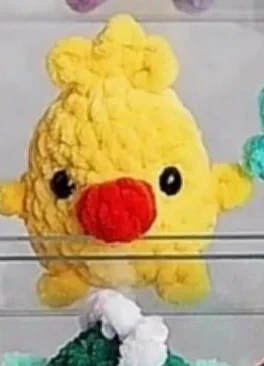
Appearance in the supplied photo: yellow with orange beak in the source photo. Eye information: 8 mm eyes in the source.
Body rounds (work from the head downward):
- R1: 6 sc in a magic ring. (6)
- R2: 6 inc. (12)
- R3: (1 sc, inc) × 6. (18)
- R4–R5: 18 sc in each round. (18 per round)
- R6: 8 sc, work one 5-dc puff/bobble in orange for the beak, then 9 sc. (18)
- R7: 2 sc, inc, 2 sc, paw, inc, (2 sc, inc) × 2, 2 sc, paw, inc, 2 sc, inc. (24)
- R8: 24 sc. (24)
- R9: 10 sc, paw, 5 sc, paw, 9 sc. (24)
- R10: 12 dec. (12)
- R11: 6 dec. (6)
Three-part head tuft: Attach yarn at the crown. Repeat this sequence three times: ch 4, sl st into the base of the tuft. Fasten off after the third loop.
Finish: Stuff, fit 8 mm eyes and close the remaining opening. Position the orange beak in line with the face before securing eye backs.
7. Mini Crochet Reindeer Pattern
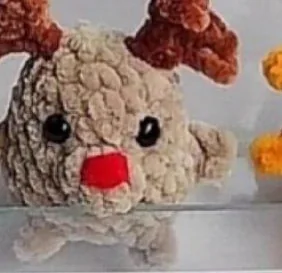
Appearance in the supplied photo: beige body with brown antlers and red nose in the source photo. Eye information: 8 mm eyes in the source.
Body rounds (work from the head downward):
- R1: 6 sc in a magic ring. (6)
- R2: 6 inc. (12)
- R3: (1 sc, inc) × 6. (18)
- R4–R5: 18 sc in each round. (18 per round)
- R6: 8 sc, one 5-dc puff/bobble, 9 sc. (18)
- R7: 2 sc, inc, 2 sc, paw, inc, (2 sc, inc) × 2, 2 sc, paw, inc, 2 sc, inc. (24)
- R8: 24 sc. (24)
- R9: 10 sc, paw, 5 sc, paw, 9 sc. (24)
- R10: 1 sc to shift the start; make a tail with ch 2, then “6 sc back” and sl st at the tail base (as printed); work 12 dec. (12). The chain and return-stitch counts conflict.
- R11: 6 dec. (6)
Branching antlers: Attach yarn to the head, ch 5, then work 3 sc back along the chain. Ch 4 for a branch, work 3 sc back along that chain and sl st at the base of the first branch. Work 1 sc farther down the original chain toward the head and sl st at the horn base. Make the second antler symmetrically.
Finish: Fasten off, stuff, fit 8 mm eyes and embroider the red nose. Close the opening. The original R10 tail description cannot be performed literally as written: ch 2 cannot hold 6 return sc.
8. Mini Crochet Frog Pattern
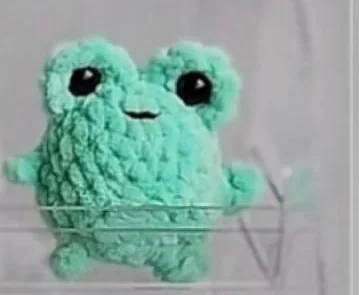
Appearance in the supplied photo: mint green in the source photo. Eye information: 10 mm plastic eyes are glued onto crocheted eye bulges in the source.
Body rounds (work from the head downward):
- R1: 6 sc in a magic ring. (6)
- R2: 6 inc. (12)
- R3: (1 sc, inc) × 6. (18)
- R4–R6: 18 sc in each of three rounds. (18 each)
- R7: 2 sc, inc, 2 sc, paw, inc, (2 sc, inc) × 2, 2 sc, paw, inc, 2 sc, inc. (24)
- R8: 24 sc. (24)
- R9: 10 sc, paw, 5 sc, paw, 9 sc. (24)
- R10: 12 dec. (12)
- R11: 6 dec. (6)
Raised eye bulges: Attach yarn near the crown. In one head stitch work 5 dc, then sl st into the next stitch. Make the second eye bulge symmetrically. The original adds 10 mm plastic eyes using glue after working these bulges.
Finish: Stuff the body and close the final opening, then position the raised eyes symmetrically. For a toy intended for children, replace glued plastic eyes with securely embroidered features; glued small parts can come loose.
9. Mini Crochet Koala Pattern
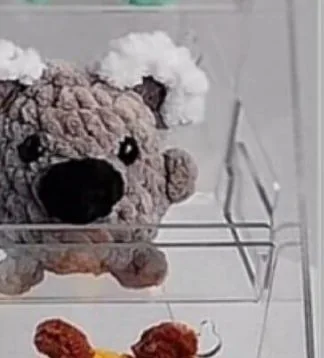
Appearance in the supplied photo: gray with contrasting white inner ears and black nose in the source photo. Eye information: 8 mm eyes in the source.
Body rounds (work from the head downward):
- R1: 6 sc in a magic ring. (6)
- R2: 6 inc. (12)
- R3: (1 sc, inc) × 6. (18)
- R4–R5: 18 sc in each round. (18 per round)
- R6: 8 sc, work one 5-dc puff/bobble in black for the nose, then 9 sc. (18)
- R7: 2 sc, inc, 2 sc, paw, inc, (2 sc, inc) × 2, 2 sc, paw, inc, 2 sc, inc. (24)
- R8: 24 sc. (24)
- R9: 10 sc, paw, 5 sc, paw, 9 sc. (24)
- R10: 12 dec. (12)
- R11: 6 dec. (6)
Large side ears: Attach yarn to the side of the head, not directly on top. Work 6 dc into one head stitch near the crown and sl st into the next stitch. Repeat symmetrically on the other side.
Finish: Fasten off, stuff, fit 8 mm eyes and close the opening. The source photos show pale/white ear details but do not specify a separate counted round for them.
10. Mini Crochet Puppy Pattern
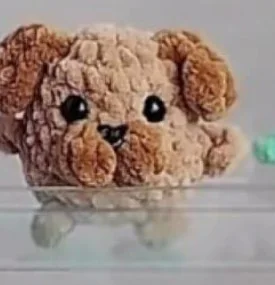
Appearance in the supplied photo: beige with brown facial accents in the source photo. Eye information: 8 mm eyes and a nose are mentioned.
Body rounds (work from the head downward):
- R1: 6 sc in a magic ring. (6)
- R2: 6 inc. (12)
- R3: (1 sc, inc) × 6. (18)
- R4–R5: 18 sc in each round. (18 per round)
- R6: 7 sc, in dark brown make two 4-dc puff/bobble stitches, then 9 sc. (18)
- R7: 2 sc, inc, 1 sc, paw, 1 sc, inc, (2 sc, inc) × 2, 1 sc, paw, 1 sc, inc, 2 sc, inc. (24)
- R8: 24 sc. (24)
- R9: 9 sc, paw, 5 sc, paw, 10 sc; ch 5 for the tail, work 4 sc back along the chain and sl st at the base. (24 body stitches)
- R10: 12 dec. (12)
- R11: 6 dec. (6)
Floppy ears: Attach yarn to the side of the head and ch 4. On the return, work 3 dc into one chain, 2 hdc into the next, and 1 sc into the next; sl st at the ear base or an adjacent stitch. Work the second ear symmetrically.
Finish: Cut yarn, stuff, install 8 mm eyes and nose, then close the remaining opening.
11. Mini Crochet Giraffe Pattern
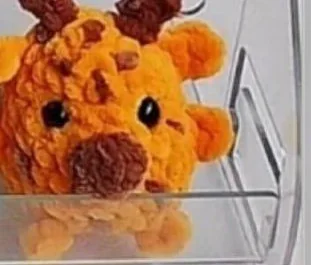
Appearance in the supplied photo: orange/yellow with brown spots in the source photo. Eye information: 8 mm eyes in the source.
Body rounds (work from the head downward):
- R1: 6 sc in a magic ring. (6)
- R2: 6 inc. (12)
- R3: (1 sc, inc) × 6. (18)
- R4–R5: 18 sc in each round. (18 per round)
- R6: 8 sc, work one 5-dc puff/bobble in brown for the muzzle, then 9 sc. (18)
- R7: 2 sc, inc, 2 sc, paw, inc, (2 sc, inc) × 2, 2 sc, paw, inc, 2 sc, inc. (24)
- R8: 24 sc. (24)
- R9: 10 sc, paw, 5 sc, paw, 9 sc. (24)
- R10: Work 1 sc for start-of-round alignment; ch 5 for the tail, work 4 sl st back along the chain and sl st at its base, then work 12 dec. (12)
- R11: 6 dec. (6)
Small ears: Attach yarn to the side of the head rather than the very top. Ch 3; on the way back work 2 sc, then sl st at the base of the ear. Repeat symmetrically.
Little horns: Attach yarn closer to the crown. Ch 3, work 2 sl st back down the chain, then sl st at the base of the horn. Make a second horn symmetrically.
Spots: Embroider the spots in brown yarn, as shown in the source photo; the original does not specify an exact number or placement grid.
Finish: Cut yarn, stuff, add 8 mm eyes, embroider spots and close the opening.
12. Mini Crochet Elephant Pattern
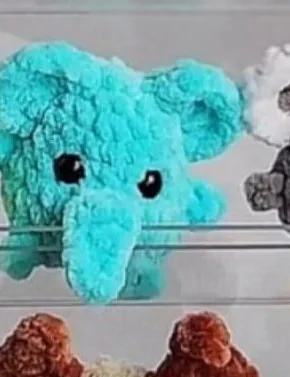
Appearance in the supplied photo: turquoise blue in the source photo. Eye information: 9 mm eyes in the source.
Body rounds (work from the head downward):
- R1: 6 sc in a magic ring. (6)
- R2: 6 inc. (12)
- R3: (1 sc, inc) × 6. (18)
- R4–R5: 18 sc in each round. (18 per round)
- R6: 9 sc, make the trunk (ch 6, work back along the chain with 3 hdc and 2 dc), then 9 sc. (18 body stitches)
- R7: 2 sc, inc, 2 sc, paw, inc, (2 sc, inc) × 2, 2 sc, paw, inc, 2 sc, inc. (24)
- R8: 24 sc. (24)
- R9: 10 sc, paw, 5 sc, paw, 9 sc. (24)
- R10: 1 sc for round-start alignment; ch 5 for the tail, work 4 sl st back along the chain and sl st at the base, then work 12 dec. (12)
- R11: 6 dec. (6)
Large ears: Attach yarn to the side of the head, close to the crown. Work 7 dc into one stitch, then sl st into the next stitch. Make the second ear symmetrically.
Finish: Stuff, install 9 mm eyes, secure the trunk carefully and close the opening. The source does not identify the exact first return chain for the trunk after ch 6; use the pictured shape as a reference, not an invented stitch location.
Finishing and Assembly
- Make sure the body has the required number of remaining stitches before tightening the final opening. Where a count is inconsistent (particularly the dragon and reindeer), stop and check the source rather than forcing an extra decrease.
- Add stuffing while the opening is still wide enough. Fill the head and body to a rounded shape without stretching the stitch gaps.
- Place the eyes, embroidered facial features, nose and any glued details in relation to the puff-stitch muzzle and symmetrical side details. For young children, embroidered features are safer than hard eyes or glued components.
- Use the yarn tail and a needle to close the remaining six-stitch opening, working through the front loops or sewing the small hole shut, as an optional general amigurumi finishing technique. This closing method is not specified in the source.
- Secure tails and horns, trim yarn ends, and inspect all attachments for firm stitching. The designs are decorative miniatures unless all materials and attachments are made suitable for the intended recipient.
Helpful Crochet Tips
Choose yarn according to the design, not a made-up gauge. The images feature plush, chenille-like stitches, but there is no written hook size or brand. A small test swatch will tell you whether stuffing might show. If the fabric gapes, try a smaller hook compatible with your yarn rather than changing the prescribed stitch counts.
Treat side details as side excursions. The mini paw chains return to the body where they began. Keeping a separate marker just after each paw makes it easier to find the next counted single crochet.
Plan facial symmetry early. Count from the center of the nose or muzzle before inserting eye backs. When crocheting the frog, the two raised eye bulges should look symmetrical before any plastic eyes are attached.
Avoid distorting small details. A tight 4-dc or 5-dc raised nose can pull the neighboring body stitches; relax the working tension slightly for the decorative stitch while keeping the main body tight enough to hold stuffing.
Troubleshooting
| Problem | Likely reason and what to check |
|---|---|
| R7 does not end at 24 | The ch-4 paw loop was incorrectly counted as extra body stitches, or one of the increases was missed. |
| Raised nose looks flat or oversized | The original does not define the puff/bobble closure method. Review the double-crochet group before changing counts. |
| Tail looks like an extra round | Long chain tails are added at specific body points; work back to their base before resuming the body. |
| Body is misshapen | Count the 18-stitch and 24-stitch checkpoints before stuffing, and distribute filling evenly. |
| Dragon will not close cleanly | Source R11 says 9 dec after 17 stitches, which cannot be worked as written; R12 is also unclear. Seek clarification instead of inventing a fix. |
| Reindeer tail will not work as written | The text specifies ch 2 followed by 6 return sc; these counts conflict and require source clarification. |
| Eye bulges or ears look uneven | Mark both attachment points before starting decorative dc clusters or side ears. |
Frequently Asked Questions
Is this a beginner-friendly mini crochet animal pattern?
The basic body rounds use simple single crochet, increases and decreases. The raised 4-dc and 5-dc features, ears attached directly to the head, and tail joins make it more appropriate for confident beginners or intermediate crocheters. The dragon and reindeer have unresolved source instructions.
What yarn and hook size should I use?
The supplied source does not specify either. The photo suggests plush textured yarn, but this is a visual observation, not a confirmed material specification. Choose a hook that produces a firm fabric with your yarn; sample dimensions and yarn amounts will vary.
Can I make just one animal?
Yes. Each of the twelve design sections includes its own complete body-round sequence and the details specific to that animal. Begin with a straightforward example such as the chick or frog before trying more elaborate tails or head features.
What do the 8 mm, 9 mm and 10 mm eye sizes mean?
They are the nominal eye diameters stated in some individual designs. Use each design’s note rather than one size for the whole collection. Consider embroidered eyes for toys intended for children under three.
Do the little paws count toward the body total?
No. The paw is formed with a ch-4 loop and a slip stitch back to its base. The main round continues from the next counted body stitch. This distinction keeps the 18-to-24 increase rounds understandable.
Does the collection include verified finished measurements or tested corrections?
The supplied source has no finished measurements or gauge. Thicker yarn and a correspondingly sized hook generally produce a larger animal; lighter yarn produces a smaller one. Keep the stitch counts unchanged and check that your fabric holds stuffing securely.
More Free Crochet Projects
Did You Make This Crochet Pattern? Leave a Review!
If you tried this pattern, please rate it and share your honest experience to help other crocheters. Reviews are moderated before publication.
Crocheter Reviews
There are no reviews yet. Be the first one to write one.
Once you finish a mini animal, a flower applique or a simple crochet home-decor project is a good next step. Browse the Amigurumi Patterns and Crochet Flowers categories on HookLoopPatterns for related ideas. Keep your stitch marker and the animal’s photo nearby while working any of the small decorative features.